multiqc --helpUsing Software at OSC
Loading ‘modules’ and activating Conda environments,
with at-home reading on installation with Conda and using Apptainer containers
Overview & setting up
To analyze RNAseq data and other genomics data sets, a typical workflow includes using a sequence of specialized bioinformatics software.
At OSC, there are system-wide installations of a number of bioinformatics programs. As we briefly saw earlier for FastQC, and will talk about more here, we do need to “load” such programs before we can use them. However, OSC’s collection of bioinformatics programs is unfortunately not comprehensive, and some of the available programs only come in relatively old versions.
We therefore also need another way to make bioinformatics programs available to ourselves. Two common methods are the Conda software management program and containers. We will talk about loading MCIC’s Conda environments, while the at-home reading covers installing software yourself with Conda, and using containers downloaded from the internet.
Start VS Code and open your folder
As always, we’ll be working in VS Code — if you don’t already have a session open, see below how to do so.
Make sure to open your /fs/ess/PAS0471/<user>/rnaseq_intro dir, either by using the Open Folder menu item, or by clicking on this dir when it appears in the Welcome tab.
Starting VS Code at OSC - with a Terminal (Click to expand)
Log in to OSC’s OnDemand portal at https://ondemand.osc.edu.
In the blue top bar, select
Interactive Appsand then near the bottom of the dropdown menu, clickCode Server.In the form that appears on a new page:
- Select an appropriate OSC project (here:
PAS0471) - For this session, select
/fs/ess/PAS0471as the starting directory - Make sure that
Number of hoursis at least2 - Click
Launch.
- Select an appropriate OSC project (here:
On the next page, once the top bar of the box has turned green and says
Runnning, clickConnect to VS Code.
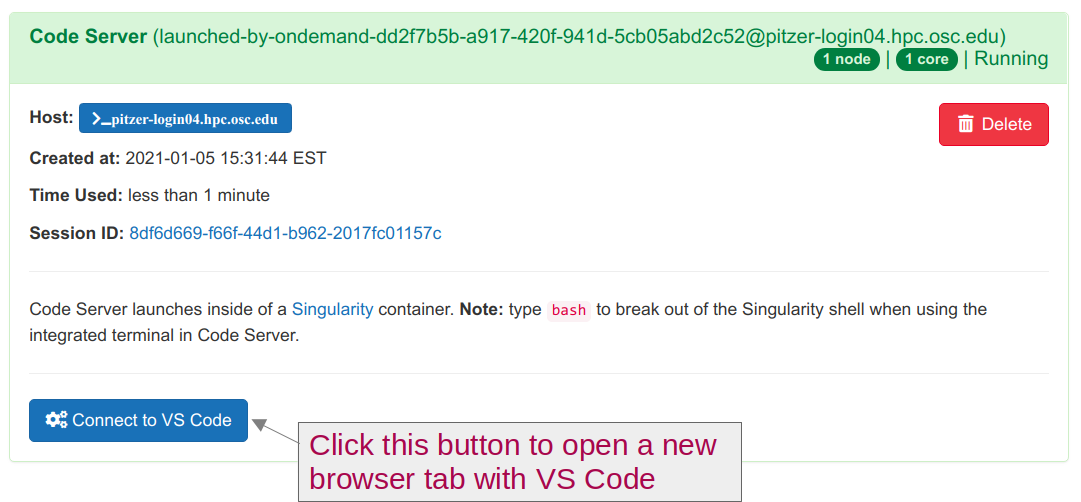
Open a Terminal by clicking =>
Terminal=>New Terminal. (Or use one of the keyboard shortcuts: Ctrl+` (backtick) or Ctrl+Shift+C.)In the
Welcometab underRecent, you should see your/fs/ess/PAS0471/<user>/rnaseq_introdir listed: click on that to open it. Alternatively, use =>File=>Open Folderto open that dir in VS Code.
Don’t have your own dir with the data? (Click to expand)
If you missed the last session, or deleted your rnaseq_intro dir entirely, run these commands to get a (fresh) copy of all files you should have so far:
mkdir -p /fs/ess/PAS0471/$USER/rnaseq_intro
cp -r /fs/ess/PAS0471/demo/202307_rnaseq /fs/ess/PAS0471/$USER/rnaseq_intro
And if you do have an rnaseq_intro dir, but you want to start over because you moved or removed some of the files while practicing, then delete the dir before your run the commands above:
rm -r /fs/ess/PAS0471/$USER/rnaseq_introYou should have at least the following files in this dir:
/fs/ess/PAS0471/demo/202307_rnaseq
├── data
│   └── fastq
│       ├── ASPC1_A178V_R1.fastq.gz
│       ├── ASPC1_A178V_R2.fastq.gz
│       ├── ASPC1_G31V_R1.fastq.gz
│       ├── ASPC1_G31V_R2.fastq.gz
│       ├── md5sums.txt
│       ├── Miapaca2_A178V_R1.fastq.gz
│       ├── Miapaca2_A178V_R2.fastq.gz
│       ├── Miapaca2_G31V_R1.fastq.gz
│       └── Miapaca2_G31V_R2.fastq.gz
├── metadata
│   └── meta.tsv
└── README.md
│   └── ref
│       ├── GCF_000001405.40.fna
│       ├── GCF_000001405.40.gtf
1 Loading software at OSC with Lmod modules
OSC administrators manage software with the “Lmod” system of software modules. For us users, this means that even though a lot of software is installed, most of it can only be used after we explicitly load it. That may seem like a drag, but on the upside, this practice enables the use of different versions of the same software, and of mutually incompatible software on a single system.
We can load, unload, and search for available software modules using the module command and its various subcommands.
1.1 Checking whether a program is available
The OSC website has a list of installed software. You can also search for available software in the shell using two subtly different module subcommands1:
module spiderlists all modules that are installed.module availlists modules that can be directly loaded given the current environment (i.e., taking into account which other software has been loaded).
Simply running module spider or module avail would spit out the full lists of installed/available programs — it is more useful to add a search term as an argument to these commands — below, we’ll search for the Conda distribution “miniconda”, with each of these two subcommands:
module spider miniconda-------------------------------------------------------------------------------------------------------------------------------------------------------------------------------------------------------------------------------
miniconda3:
-------------------------------------------------------------------------------------------------------------------------------------------------------------------------------------------------------------------------------
Versions:
miniconda3/4.10.3-py37
miniconda3/4.12.0-py38
miniconda3/4.12.0-py39
miniconda3/23.3.1-py310
-------------------------------------------------------------------------------------------------------------------------------------------------------------------------------------------------------------------------------
For detailed information about a specific "miniconda3" module (including how to load the modules) use the module's full name.
For example:
$ module spider miniconda3/4.12.0-py39
-------------------------------------------------------------------------------------------------------------------------------------------------------------------------------------------------------------------------------module avail miniconda------------------------------------------------------------------------------------------------------ /apps/lmodfiles/Core -------------------------------------------------------------------------------------------------------
miniconda3/4.10.3-py37 (D) miniconda3/4.12.0-py38 miniconda3/4.12.0-py39 miniconda3/23.3.1-py310
Where:
D: Default ModuleAs stated at the bottom of the output below, the (D) in the module avail output above marks the default version of the program: this is the version of the program that will be loaded if we don’t specify a version ourselves (see examples below). The module spider command does not provide this information.
1.2 Loading software
All other Lmod software functionality is also accessed using module subcommands. For instance, to make a program available to us we use the load subcommand:
# Load a module:
module load miniconda3               # Load the default version
module load miniconda3/23.3.1-py310  # Load a specific version
Modules do not remain loaded across separate shell sessions
Module loading does not persist across shell sessions. Whenever you get a fresh shell session (including but not limited to after logging into OSC again), you will have to (re)load any modules you want to use!
To check which modules have been loaded, use module list. Its output will also include automatically loaded modules, so for example, if you loaded miniconda3/23.3.1-py310, you should see the following list where the miniconda3 module is listed as the 6th entry:
module listCurrently Loaded Modules:
1) xalt/latest 2) gcc-compatibility/8.4.0 3) intel/19.0.5 4) mvapich2/2.3.3 5) modules/sp2020 6) miniconda3/23.3.1-py310Occasionally, when you run into conflicting (mutually incompatible) modules, it can be useful to unload modules, which you can do as follows:
module unload miniconda3    # Unload a specific module
module purge                # Unload all modules
1.3 A practical example: FastQC again
Here, we’ll load the module for FastQC again. First, let’s confirm that we indeed cannot currently use FastQC by running the fastqc command with the --help option:
fastqc --helpbash: fastqc: command not found
Help!
Many command-line programs can be run with with a --help (and/or -h) flag, and this is often a good thing to try first, since it will tell use whether we can use the program — and if we can, we immediately get some usage information.
Next, let’s check whether FastQC is available at OSC, and if so, in which versions:
module avail fastqcfastqc/0.11.8There is only one version available (0.11.8), which means that module load fastqc and module load fastqc/0.11.8 would each load that same version.
What might still be a reason to specify the version when we load the FastQC module?
When we use the module load command inside a script, specifying a version would:
Ensure that when we run the same script a year later, the same version would be used (assuming it hasn’t been removed) — otherwise, it’s possible a newer version would has been installed in the meantime, which might produce different results.
Make it easy to see which version we used, which is something we typically report in papers.
Let’s load the FastQC module:
module load fastqc/0.11.8Now, we can retry our --help attempt:
fastqc --help FastQC - A high throughput sequence QC analysis tool
SYNOPSIS
fastqc seqfile1 seqfile2 .. seqfileN
fastqc [-o output dir] [--(no)extract] [-f fastq|bam|sam]
[-c contaminant file] seqfile1 .. seqfileN
# [...truncated...]On your own: load miniconda3
The miniconda3 module will allow us to use Conda software environments, which we’ll talk about more below.
Let’s start with a clean sheet by running
module purge.Load the default version of
miniconda3, and then check which version was loaded.
Solution (Click here)
module load miniconda3

module list
Currently Loaded Modules:
1) xalt/latest 2) gcc-compatibility/8.4.0 3) intel/19.0.5 4) mvapich2/2.3.3 5) modules/sp2020 6) miniconda3/4.10.3-py37The version 4.10.3-py37 was loaded.
- Now load the latest version of
miniconda3without unloading the earlier version first. What output do you get?
Solution (Click to expand)
Lmod detected that you tried to load a different version of a software that was already loaded, so it changes the version and tells you about it:
module load miniconda3/23.3.1-py310The following have been reloaded with a version change:
1) miniconda3/4.10.3-py37 => miniconda3/23.3.1-py3102 When software isn’t installed at OSC
It’s not too uncommon that software you need for your project is not installed at OSC, or that you need a more recent version of the software than what is available. In that case, the following two are generally your best options:
Conda, which creates software environments that you can activate much like the Lmod modules.
Containers, which are self-contained software environments that include operating systems, akin to mini virtual machines. While Docker containers are most well-known, OSC uses Apptainer (formerly known as Singularity) containers.
Other options to install software / get it installed
Send an email to OSC Help. They might be able to help you with your installation, or in case of commonly used software, might be willing to perform a system-wide installation (that is, making it available through Lmod /
modulecommands).“Manually” install the software, which in the best case involves downloading a directly functioning binary (executable), but more commonly requires you to “compile” (build) the program. This is sometimes straightforward but can also become extremely tricky, especially at OSC where you don’t have “administrator privileges”2 and will often have difficulties with “dependencies”3.
Conda and containers are useful not only at OSC, where they bypass issues with dependencies and administrator privileges, but more generally for reproducible and portable software environments. They also allow you to easily maintain distinct “environments”, each with a different version of the same software, or with mutually incompatible software.
Next, we’ll talk about Conda and using the MCIC’s Conda environments. The at-home reading includes installing software yourself with Conda, and using containers downloaded from the internet.
3 Intro to Conda & using MCIC’s Conda environments
The Conda software can create so-called environments in which one can install one or more software packages.
As you can see in the at-home reading below, as long as a program is available in one of the online Conda repositories (which is nearly always for bioinformatics programs), then installing it is quite straightforward, doesn’t require admin privileges, and is done with a procedure that is nearly identical regardless of the program you are installing.
However, at OSC, you will probably not even have to install anything yourself, at least not if you are following “standard” workflows with common data like RNAseq. To this end, I maintain an “MCIC collection” of Conda environments that anyone can use.
A Conda environment is just a directory, and since all the environments in this collection are in the same place at OSC, you can list the MCIC Conda environments as follows:
ls /fs/ess/PAS0471/jelmer/condaabricate-1.0.1 bedops-2.4.39 checkm-1.2.0 entrez-direct htseq-2.0.2 longstitch-1.0.3 nanopolish-0.13.2 prokka repeatmasker-4.1.2.p1 samtools star
agat-0.9.1 bedtools clinker evigene inspector-1.2.0 mafft ncbi-datasets pseudofinder repeatmodeler-2.0.3 scoary subread-2.0.1
alv bioawk clonalframeml fastp interproscan-5.55 maskrc-svg nextdenovo-env purge_dups-1.2.6 resfinder seqkit tgsgapcloser
amrfinderplus biopython codan-1.2 fastqc iqtree medaka-1.7.2 nextflow pycoqc-2.5.2 resistomeanalyzer-2018.09.06 seqtk tracy-0.7.1
antismash bit cogclassifier fastq-dl justorthologs-0.0.2 metaxa-2.2.3 orna-2.0 qiime2-2022.8 rgi-5.2.1 signalp-6.0 transabyss-2.0.1
ariba-2.14.6 blast cutadapt fasttree-2.1.11 kallisto-0.48.0 minibusco orthofinder qualimap-env r-metabar sistr-1.1.1 transdecoder-5.5.0
astral-5.7.8 bowtie2-2.5.0 deeploc filtlong-env kat-2.4.2 minimap2-2.24 orthofisher quast-5.0.2 rnaquast-2.2.1 smartdenovo-env treetime
aswcli bracken-2.6.1 deeptmhmm flye-2.9.1 knsp-3.1 mlst panaroo quickmerge-env roary-3.13 snippy-4.6.0 trimgalore
bactopia braker2-env deeptmhmm2 fmlrc2-0.1.7 kofamscan mlst_check phylofisher racon-1.5.0 r-rnaseq snp-sites-2.5.1 trimmomatic-0.39
bactopia-dev busco diamond gcta kraken2-2.1.2 mobsuite pilon-1.24 ragtag-2.1.0 rsem-1.3.3 soapdenovo-trans-1.0.4 trinity-2.13.2
bakta bwa-0.7.17 dwgsim gffread-0.12.7 krakentools-1.2 multiqc pkgs rascaf rseqc-env sortmerna-env unicycler
base bwa-mem-2.2.1 eggnogmapper gubbins krona mummer4 plasmidfinder-2.1.6 rcorrector-1.0.5 r_tree sourmash virulencefinder
bbmap cactus emboss hisat2 liftoff-1.6.3 nanolyse-1.2.1 plink2 r-deseq sabre-1.0 spades-3.15.5 wtdbg-2.5
bcftools cgmlst entap-0.10.8 hmmer links-2.0.1 nanoplot porechop recognizer-1.8.3 salmon sra-toolsThis is organized similarly to the Lmod modules in that there’s generally one separate environment for one program (and all its dependencies), and the environment is named after that program.
The naming of the environments is unfortunately not entirely consistent: many environments include the version number of the program, but many others do not. (Generally speaking, for environments without version numbers, you should expect the version of the program to be very recent, as I try to keep these up-to-date4).
This collection includes Conda environments for several programs we need during RNAseq analysis that are not installed at OSC, such as MultiQC, TrimGalore, and SortMeRNA.
3.1 Activating Conda environments
Conda itself is already installed at OSC through Miniconda, but we always need to load its module before we can use it:
module load miniconda3As mentioned above, these environments are activated and deactivated in a similar manner as with the Lmod system. But whereas we use the term “load” for Lmod modules, we use “activate” for Conda environments — it means the same thing.
Also like Lmod, there is a main command (conda) and several subcommands (deactivate, create, install, update) for different functionality. However, for historical reasons, the most foolproof way to activate a Conda environment is to use source activate rather than the expected conda activate — for instance:
source activate /fs/ess/PAS0471/jelmer/conda/multiqc(multiqc) [jelmer@p0085 rnaseq-intro]$
Conda environment indicator
When we have an active Conda environment, its name is displayed in front of our prompt, as depicted above with (multiqc).
After we have activated the MultiQC environment, we should be able to actually use the program. To test this, we’ll simply run the multiqc command with the --help option like we did for FastQC:
 /// MultiQC 🔍 | v1.15

 Usage: multiqc [OPTIONS] [ANALYSIS DIRECTORY]

 MultiQC aggregates results from bioinformatics analyses across many samples into a single report.
 It searches a given directory for analysis logs and compiles a HTML report. It's a general use tool, perfect for summarising the output from numerous bioinformatics tools.
 To run, supply with one or more directory to scan for analysis results. For example, to run in the current working directory, use 'multiqc .'

╭─ Main options ──────────────────────────────────────────────────────────────────────────────────────────────────────────────────────────────────────────────────────────────────────────────────────────────────────────────────╮
│ --force            -f  Overwrite any existing reports                                                                                                                                                                           │
│ --config           -c  Specific config file to load, after those in MultiQC dir / home dir / working dir. (PATH)                                                                                                                │
│ --cl-config            Specify MultiQC config YAML on the command line (TEXT)                                                                                                                                                   │
│ --filename         -n  Report filename. Use 'stdout' to print to standard out. (TEXT)                                                                                                                                           │
│ --outdir           -o  Create report in the specified output directory. (TEXT)                                                                                                                                                  │
│ --ignore           -x  Ignore analysis files (GLOB EXPRESSION)                                                                                                                                                                  │
│ --ignore-samples       Ignore sample names (GLOB EXPRESSION)                                                                                                                                                                    │
│ --ignore-symlinks      Ignore symlinked directories and files                                                                                                                                                                   │
│ --file-list        -l  Supply a file containing a list of file paths to be searched, one per row                                                                                                                                │
╰─────────────────────────────────────────────────────────────────────────────────────────────────────────────────────────────────────────────────────────────────────────────────────────────────────────────────────────────────╯
[...truncated...]
Unlike Lmod / module load, Conda will by default only keep a single environment active. Therefore, when you have one environment activate and then activate another, you will switch environments:
# After running this command, the multiqc env will be active
source activate /fs/ess/PAS0471/jelmer/conda/multiqc

# After running his command, the trimgalore env will be active...
source activate /fs/ess/PAS0471/jelmer/conda/trimgalore

# ...but the multiqc env will no longer be:
multiqc --help
bash: multiqc: command not found...However, the conda activate --stack option enables you to have multiple Conda environments active at once:
# Assuming you had trimgalore activated, now add the multiqc env:
conda activate --stack /fs/ess/PAS0471/jelmer/conda/multiqc

multiqc --help
# (Output not shown, but this should print help info)

trim_galore --help
# (Output not shown, but this should print help info)
Note that the command is conda activate --stack and not source activate --stack!
3.2 Lines to add to your shell script
As mentioned above for Lmod modules, you need to load them in every shell session you want to use them — and the same is true for Conda environments. While Conda enviroments that are loaded in your interactive shell environment will “carry over” to the environment in which your script runs (even when you submit them to the Slurm queue with sbatch; topic of the next session), it is good practice to always include the necessary code to load/activate programs in your shell scripts.
When the program you will run in a script is in an Lmod module, this only involves a module load call — e.g., for FastQC:
#!/bin/bash
set -euo pipefail

# Load software
module load fastqc
When the program you will run in a script is in a Conda environment, this entails a module load command to load Conda itself, followed by a source activate command to load the relevant Conda environment — e.g. for MultiQC:
#!/bin/bash

# Load software
module load miniconda3
source activate /fs/ess/PAS0471/jelmer/conda/multiqc

# Strict/safe Bash settings
set -euo pipefail
Perils of Conda environments inside scripts
In the example above, the
set -euo pipefailline was moved below thesource activatecommand, because the Conda activation procedure can otherwise result in “unbound variable” errors.Another unfortunate aspect of Conda environments at OSC is the following. Problems can occur when you have a Conda environment active in your interactive shell while you submit a script as a batch job that activates a different environment.
Therefore, it is generally a good idea to not have any Conda environments active in your interactive shell when submitting batch jobs5. To deactivate the currently active Conda environment, simply type
conda deactivatewithout any arguments:conda deactivate
At-home reading: Creating your own Conda environments
When you want to create your own Conda environments and install programs, make sure to load the most recent miniconda3 module, which is currently not the default one. This is because installation has become much quicker and less likely to fail than in earlier versions. (Note that when we are just loading environments, like above, the version doesn’t matter).
As of August 2023, the most recent miniconda version is 23.3.1-py310 (recall that you can list available versions with module spider):
module load miniconda3/23.3.1-py310One-time Conda configuration
Before we can create our own environments, we first have to do some one-time configuration6. This will set the Conda “channels” (basically, software repositories) that we want to use when we install programs, including the relative priorities among channels (since one program may be available from multiple channels).
We can do this configuration with the config subcommand — run the following commands in your shell:
conda config --add channels defaults     # Added first => lowest priority
conda config --add channels bioconda
conda config --add channels conda-forge  # Added last => highest priority
Let’s check whether the configuration was successfully saved:
conda config --get channels--add channels 'defaults' # lowest priority
--add channels 'bioconda'
--add channels 'conda-forge' # highest priority3.3 Example: Creating an environment for Trim Galore!
To practice using Conda, we will now create a Conda environment with the program Trim Galore! installed. Trim Galore! is a commonly used tool for quality trimming and adapter trimming of FASTQ files — we’ll learn more about it in a later session, since we will use it on our RNAseq data. It does not have a system-wide installation at OSC, unfortunately.
Here is the command to all at once create a new Conda environment and install Trim Galore! into that environment:
# (Don't run this)
conda create -y -n trim-galore -c bioconda trim-galore
Let’s break that command down:
createis the Conda subcommand to create a new environment.-yis a flag that prevents us from being asked to confirm installation once Conda has determined what needs to be installed.Following the
-noption, we can specify the name of the environment, so-n trim-galoremeans that we want our environment to be calledtrim-galore. We can use whatever name we like for the environment, but of course a descriptive yet concise name is a good idea. Since we are making a single-program environment, it makes sense to simply name it after the program.Following the
-coption, we can specify a “channel” (repository) from which we want to install, so-c biocondaindicates we want to use thebiocondachannel. (Given that we’ve done some config above, this is not always necessary, but it can be good to be explicit.)The
trim-galoreat the end of the line simply tells Conda to install the package of that name. This is a “positional” argument to the command (note that there’s no option like-sbefore it): we put any software package(s) we want to install at the end of the command.
Specifying a version
If we want to be explicit about the version we want to install, we can add the version after = following the package name, and may also want to include that version number in the Conda environment’s name — try running the command below:
conda create -y -n trim-galore-0.6.10 -c bioconda trim-galore=0.6.10Collecting package metadata (current_repodata.json): done
Solving environment: done
# [...truncated...]
See the full output when I ran this command (Click to expand)
Collecting package metadata (current_repodata.json): done
Solving environment: done


==> WARNING: A newer version of conda exists. <==
  current version: 23.3.1
  latest version: 23.7.2

Please update conda by running

    $ conda update -n base -c defaults conda

Or to minimize the number of packages updated during conda update use

     conda install conda=23.7.2


## Package Plan ##

  environment location: /fs/project/PAS0471/jelmer/conda/trimgalore-0.6.10

  added / updated specs:
    - trim-galore=0.6.10


The following packages will be downloaded:

    | package            | build                                            |
    | ------------------ | ------------------------------------------------ |
    | bz2file-0.98       | py_0           9 KB  conda-forge                 |
    | cutadapt-1.18      | py37h14c3975_1         206 KB  bioconda          |
    | fastqc-0.12.1      | hdfd78af_0        11.1 MB  bioconda              |
    | pigz-2.6           | h27826a3_0          87 KB  conda-forge           |
    | python-3.7.12      | hf930737_100_cpython        57.3 MB  conda-forge |
    | trim-galore-0.6.10 | hdfd78af_0          45 KB  bioconda              |
    | xopen-0.7.3        | py_0          11 KB  bioconda                    |
    ------------------------------------------------------------
                                           Total:        68.8 MB

The following NEW packages will be INSTALLED:

  _libgcc_mutex      conda-forge/linux-64::_libgcc_mutex-0.1-conda_forge
  _openmp_mutex      conda-forge/linux-64::_openmp_mutex-4.5-2_gnu
  alsa-lib           conda-forge/linux-64::alsa-lib-1.2.9-hd590300_0
  bz2file            conda-forge/noarch::bz2file-0.98-py_0
  bzip2              conda-forge/linux-64::bzip2-1.0.8-h7f98852_4
  ca-certificates    conda-forge/linux-64::ca-certificates-2023.7.22-hbcca054_0
  cairo              conda-forge/linux-64::cairo-1.16.0-hbbf8b49_1016
  cutadapt           bioconda/linux-64::cutadapt-1.18-py37h14c3975_1
  expat              conda-forge/linux-64::expat-2.5.0-hcb278e6_1
  fastqc             bioconda/noarch::fastqc-0.12.1-hdfd78af_0
  font-ttf-dejavu-s~ conda-forge/noarch::font-ttf-dejavu-sans-mono-2.37-hab24e00_0
  font-ttf-inconsol~ conda-forge/noarch::font-ttf-inconsolata-3.000-h77eed37_0
  font-ttf-source-c~ conda-forge/noarch::font-ttf-source-code-pro-2.038-h77eed37_0
  font-ttf-ubuntu    conda-forge/noarch::font-ttf-ubuntu-0.83-hab24e00_0
  fontconfig         conda-forge/linux-64::fontconfig-2.14.2-h14ed4e7_0
  fonts-conda-ecosy~ conda-forge/noarch::fonts-conda-ecosystem-1-0
  fonts-conda-forge  conda-forge/noarch::fonts-conda-forge-1-0
  freetype           conda-forge/linux-64::freetype-2.12.1-hca18f0e_1
  gettext            conda-forge/linux-64::gettext-0.21.1-h27087fc_0
  giflib             conda-forge/linux-64::giflib-5.2.1-h0b41bf4_3
  graphite2          conda-forge/linux-64::graphite2-1.3.13-h58526e2_1001
  harfbuzz           conda-forge/linux-64::harfbuzz-7.3.0-hdb3a94d_0
  icu                conda-forge/linux-64::icu-72.1-hcb278e6_0
  keyutils           conda-forge/linux-64::keyutils-1.6.1-h166bdaf_0
  krb5               conda-forge/linux-64::krb5-1.21.2-h659d440_0
  lcms2              conda-forge/linux-64::lcms2-2.15-haa2dc70_1
  ld_impl_linux-64   conda-forge/linux-64::ld_impl_linux-64-2.40-h41732ed_0
  lerc               conda-forge/linux-64::lerc-4.0.0-h27087fc_0
  libcups            conda-forge/linux-64::libcups-2.3.3-h4637d8d_4
  libdeflate         conda-forge/linux-64::libdeflate-1.18-h0b41bf4_0
  libedit            conda-forge/linux-64::libedit-3.1.20191231-he28a2e2_2
  libexpat           conda-forge/linux-64::libexpat-2.5.0-hcb278e6_1
  libffi             conda-forge/linux-64::libffi-3.4.2-h7f98852_5
  libgcc-ng          conda-forge/linux-64::libgcc-ng-13.1.0-he5830b7_0
  libglib            conda-forge/linux-64::libglib-2.76.4-hebfc3b9_0
  libgomp            conda-forge/linux-64::libgomp-13.1.0-he5830b7_0
  libiconv           conda-forge/linux-64::libiconv-1.17-h166bdaf_0
  libjpeg-turbo      conda-forge/linux-64::libjpeg-turbo-2.1.5.1-h0b41bf4_0
  libnsl             conda-forge/linux-64::libnsl-2.0.0-h7f98852_0
  libpng             conda-forge/linux-64::libpng-1.6.39-h753d276_0
  libsqlite          conda-forge/linux-64::libsqlite-3.42.0-h2797004_0
  libstdcxx-ng       conda-forge/linux-64::libstdcxx-ng-13.1.0-hfd8a6a1_0
  libtiff            conda-forge/linux-64::libtiff-4.5.1-h8b53f26_0
  libuuid            conda-forge/linux-64::libuuid-2.38.1-h0b41bf4_0
  libwebp-base       conda-forge/linux-64::libwebp-base-1.3.1-hd590300_0
  libxcb             conda-forge/linux-64::libxcb-1.15-h0b41bf4_0
  libzlib            conda-forge/linux-64::libzlib-1.2.13-hd590300_5
  ncurses            conda-forge/linux-64::ncurses-6.4-hcb278e6_0
  openjdk            conda-forge/linux-64::openjdk-20.0.0-h8e330f5_0
  openssl            conda-forge/linux-64::openssl-3.1.2-hd590300_0
  pcre2              conda-forge/linux-64::pcre2-10.40-hc3806b6_0
  perl               conda-forge/linux-64::perl-5.32.1-4_hd590300_perl5
  pigz               conda-forge/linux-64::pigz-2.6-h27826a3_0
  pip                conda-forge/noarch::pip-23.2.1-pyhd8ed1ab_0
  pixman             conda-forge/linux-64::pixman-0.40.0-h36c2ea0_0
  pthread-stubs      conda-forge/linux-64::pthread-stubs-0.4-h36c2ea0_1001
  python             conda-forge/linux-64::python-3.7.12-hf930737_100_cpython
  readline           conda-forge/linux-64::readline-8.2-h8228510_1
  setuptools         conda-forge/noarch::setuptools-68.0.0-pyhd8ed1ab_0
  sqlite             conda-forge/linux-64::sqlite-3.42.0-h2c6b66d_0
  tk                 conda-forge/linux-64::tk-8.6.12-h27826a3_0
  trim-galore        bioconda/noarch::trim-galore-0.6.10-hdfd78af_0
  wheel              conda-forge/noarch::wheel-0.41.1-pyhd8ed1ab_0
  xopen              bioconda/noarch::xopen-0.7.3-py_0
  xorg-fixesproto    conda-forge/linux-64::xorg-fixesproto-5.0-h7f98852_1002
  xorg-inputproto    conda-forge/linux-64::xorg-inputproto-2.3.2-h7f98852_1002
  xorg-kbproto       conda-forge/linux-64::xorg-kbproto-1.0.7-h7f98852_1002
  xorg-libice        conda-forge/linux-64::xorg-libice-1.1.1-hd590300_0
  xorg-libsm         conda-forge/linux-64::xorg-libsm-1.2.4-h7391055_0
  xorg-libx11        conda-forge/linux-64::xorg-libx11-1.8.6-h8ee46fc_0
  xorg-libxau        conda-forge/linux-64::xorg-libxau-1.0.11-hd590300_0
  xorg-libxdmcp      conda-forge/linux-64::xorg-libxdmcp-1.1.3-h7f98852_0
  xorg-libxext       conda-forge/linux-64::xorg-libxext-1.3.4-h0b41bf4_2
  xorg-libxfixes     conda-forge/linux-64::xorg-libxfixes-5.0.3-h7f98852_1004
  xorg-libxi         conda-forge/linux-64::xorg-libxi-1.7.10-h7f98852_0
  xorg-libxrender    conda-forge/linux-64::xorg-libxrender-0.9.11-hd590300_0
  xorg-libxt         conda-forge/linux-64::xorg-libxt-1.3.0-hd590300_1
  xorg-libxtst       conda-forge/linux-64::xorg-libxtst-1.2.3-h7f98852_1002
  xorg-recordproto   conda-forge/linux-64::xorg-recordproto-1.14.2-h7f98852_1002
  xorg-renderproto   conda-forge/linux-64::xorg-renderproto-0.11.1-h7f98852_1002
  xorg-xextproto     conda-forge/linux-64::xorg-xextproto-7.3.0-h0b41bf4_1003
  xorg-xproto        conda-forge/linux-64::xorg-xproto-7.0.31-h7f98852_1007
  xz                 conda-forge/linux-64::xz-5.2.6-h166bdaf_0
  zlib               conda-forge/linux-64::zlib-1.2.13-hd590300_5
  zstd               conda-forge/linux-64::zstd-1.5.2-hfc55251_7


Downloading and Extracting Packages

Preparing transaction: done
Verifying transaction: done
Executing transaction: done
#
# To activate this environment, use
#
#     $ conda activate trimgalore-0.6.10
#
# To deactivate an active environment, use
#
#     $ conda deactivate
Now, you should be able to activate the enviroment (using just it’s name – see the box below):
# Activate the environment:
source activate trim-galore

# Test if TrimGalore can be run - note, the command is 'trim_galore':
trim_galore --help
USAGE:
trim_galore [options] <filename(s)>
-h/--help Print this help message and exits.
# [...truncated...]
Specifying the full path to the environment dir
You may have noticed above that we merely gave the enviroment a name (trim-galore or trim-galore-0.6.10), and did not tell it where to put this environment. Similarly, we were able to activate the environment with just its name. Conda assigns a personal default directory for its environments, somewhere in your Home directory.
You can install environments in a different location with the -p (instead of -n) option, for example:
mkdir -p /fs/scratch/PAS0471/$USER/conda
conda create -y -p /fs/scratch/PAS0471/$USER/conda/trim-galore -c bioconda trim-galoreAnd when you want to load someone else’s Conda environments, you’ll always have to specify the full path to environment’s dir, like you did when loading an MCIC Conda environment above.
3.4 Finding the Conda installation info online
Minor variations on the conda create command above can be used to install almost any program for which a Conda package is available, which is the vast majority of open-source bioinformatics programs!
However, you may be wondering how we would know:
- Whether the program is available and what its Conda package’s name is
- Which Conda channel we should use
- Which versions are available
My strategy to finding this out is to simply Google the program name together with “conda”, e.g. “cutadapt conda” if I wanted to install the CutAdapt program. Let’s see that in action:
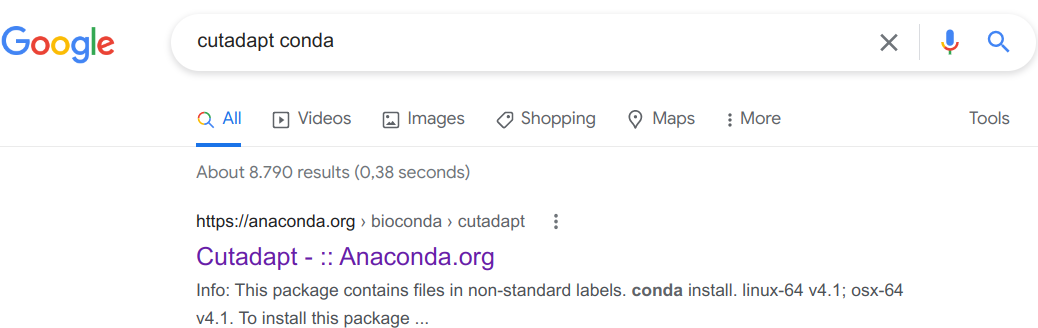
Click on that first link (it should always be the first Google hit):
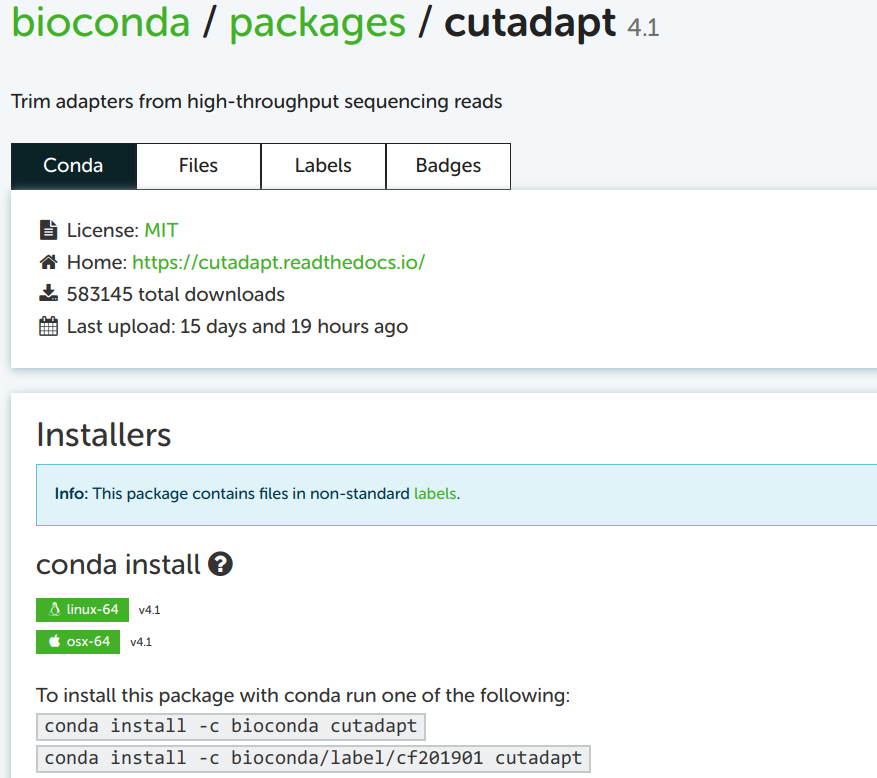
Build the installation command
I always take the top of the two example installation commands as a template, which is here: conda install -c bioconda cutadapt.
You may notice the install subcommand, which we haven’t yet seen. This would install Cutadapt into the currently activated Conda environment. Since our strategy here –and my general strategy– is to create a new environment each time you’re installing a program, just installing a program into whatever environment is currently active is not a great idea. To use the install command with a new environment, the strategy would be to first create an “empty” environment, and then run the install command.
However, we saw above that we can do all of this in a single command. To build this create-plus-install command, all we need to do is replace install in the example command on the Conda website by create -y -n <env-name>. Then, our full command (without version specification) will be:
conda create -y -n cutadapt -c bioconda cutadaptTo see which version will be installed by default, and to see which older versions are available:

For almost any other program, you can use the exact same procedure to find the Conda package and install it!
A few more Conda commands to manage your environments
Export a plain-text “YAML” file that contains the instructions to recreate your currently-active environment (useful for reproducibility!)
conda env export > my_env.ymlAnd you can use the following to create a Conda environment from such a YAML file:
conda env create -n my_env --force --file my_env.ymlRemove an environment entirely:
conda env remove -n cutadaptList all your conda environments:
conda env listList all packages (programs) installed in an environment — due to dependencies, this can be a long list, even if you only actively installed one program:
conda list -p /fs/ess/PAS0471/jelmer/conda/multiqc
Use one environment per program (as here) or one per research project
Below are two reasonable ways to organize your Conda environments, and their respective advantages:
- Have one environment per program (my preference)
- Easier to keep an overview of what you have installed
- No need to reinstall the same program across different projects
- Less risk of running into problems with your environment due to mutually incompatible software and complicated dependency situations
- Have one environment per research project
- You just need to activate that one environment when you’re working on your project.
- Easier when you need to share your entire project with someone else (or yourself) on a different (super)computer.
Even though it might seem easier, a third alternative, to simply install all programs across all projects in one single environment, is not recommended. This doesn’t benefit reproducibility, and your environment is likely to stop functioning properly sooner or later.
(A side note: even when you want to install a single program, multiple programs are in fact nearly always installed: the programs that your target program depends on, i.e. “dependencies”.)
At-home reading: Using Apptainer containers
Besides Conda, containers are another way to use bioinformatics programs at OSC that don’t have system-wide installations.
Containers are similar to Virtual Machines and different from Conda environments in that they come with an entire operating system. This makes creating your own container “image” (see box below on terminology) much more involved than creating a Conda environment, and we will not cover that here.
However, there are pre-existing container images available for most bioinformatics programs, and they can be easily found, downloaded, and used.
Container terminology
- Container image: File (Apptainer) or files (Docker) that contain the container application.
- Container (sensu stricto): A running container image.
- Definition file (Apptainer) / Dockerfile (Docker): A plain text file that contains the recipe to build a container image.
Among container platforms, Apptainer (formerly known as Singularity) and especially Docker are the most widely used ones. At supercomputers like OSC, however, only Apptainer containers can be used. Luckily, the Apptainer program can work with Docker container images: it will convert them on the fly.
Finding container images online
There are several online repositories with publicly available container images, but I would recommend BioContainers https://biocontainers.pro/registry or Quay.io https://quay.io/biocontainers.
For example, let’s look on the BioContainers website for a TrimGalore container image:
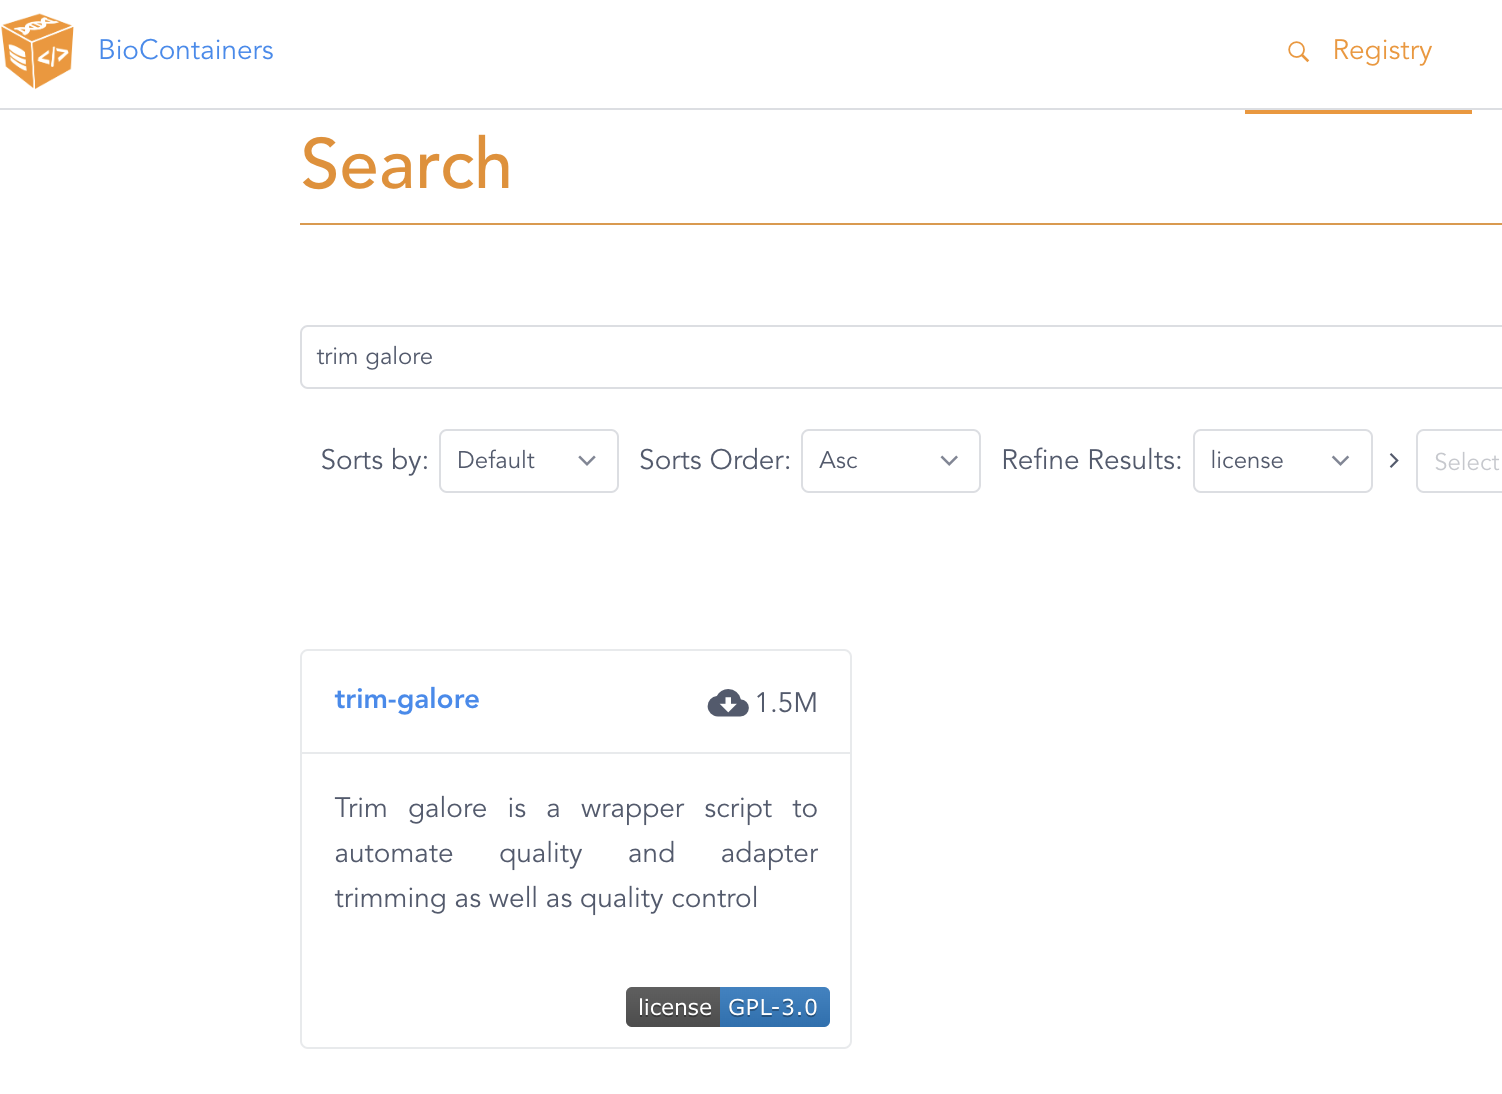
Click on the only entry that is shown, trim-galore, which will get you to a page like this:
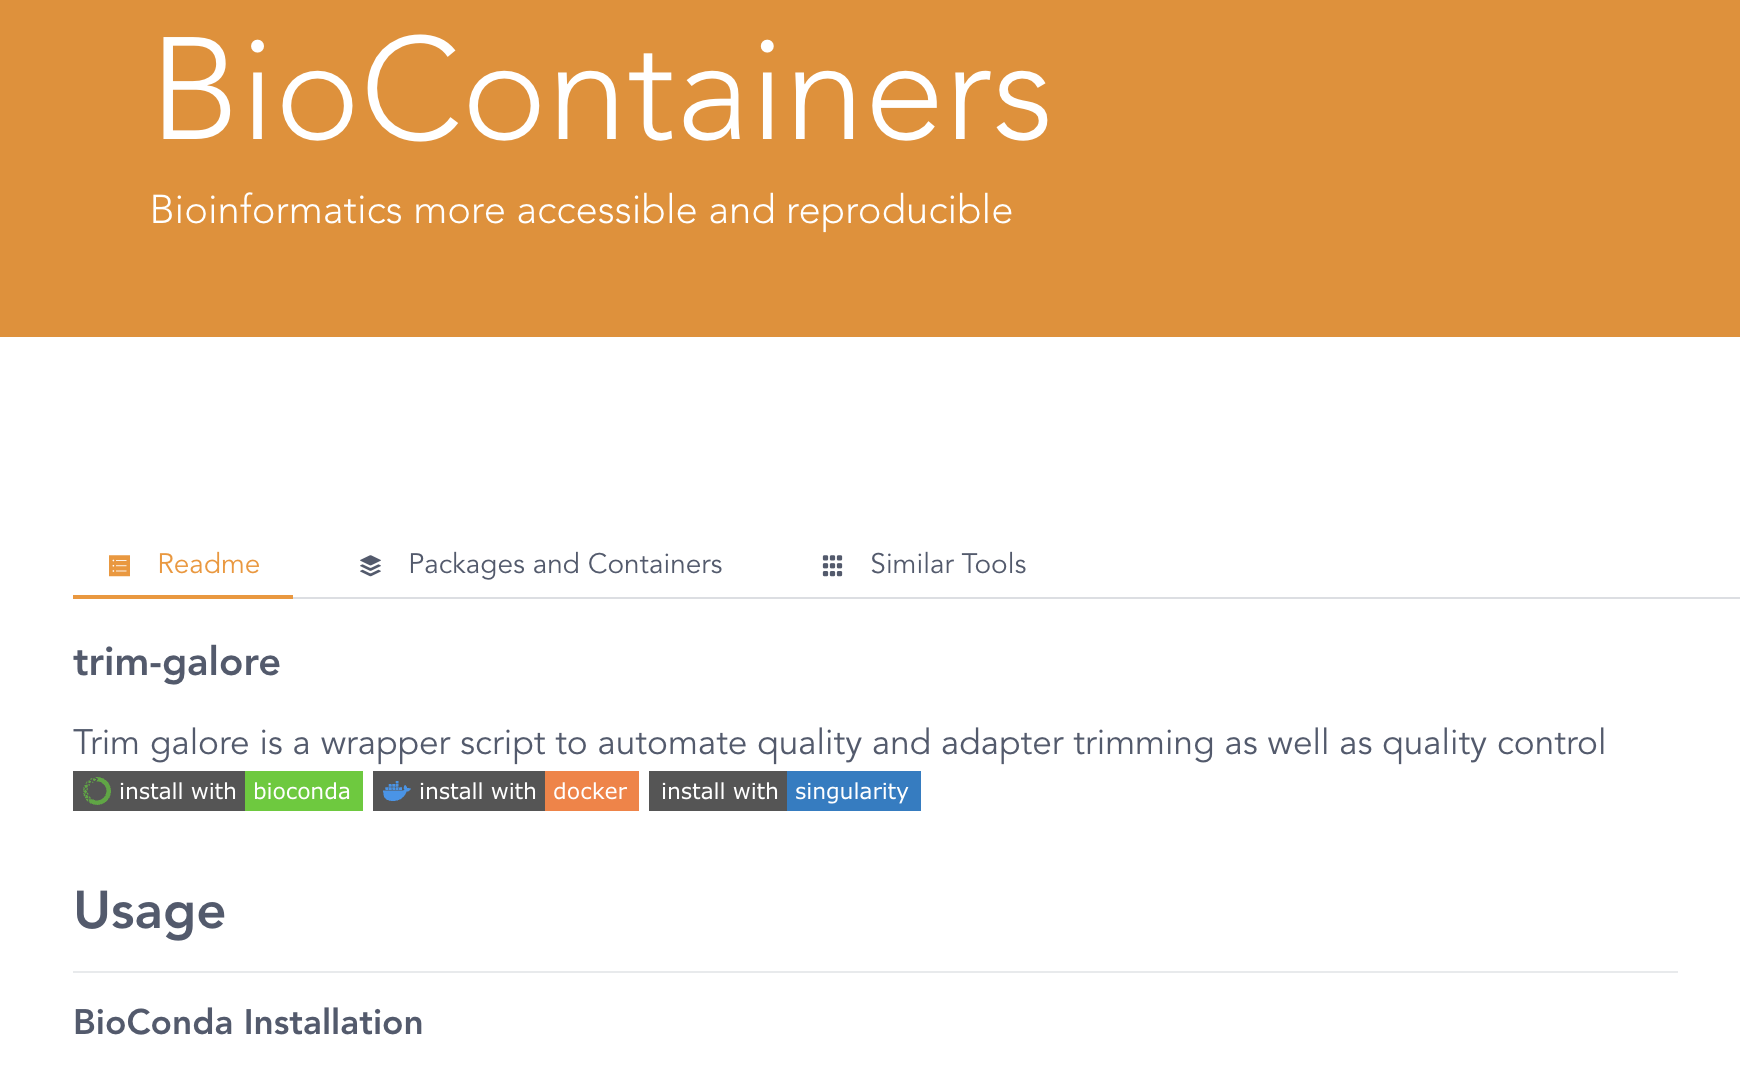
As you can see, this website also includes Conda installation instructions — to see the container results, scroll down and you should see this:
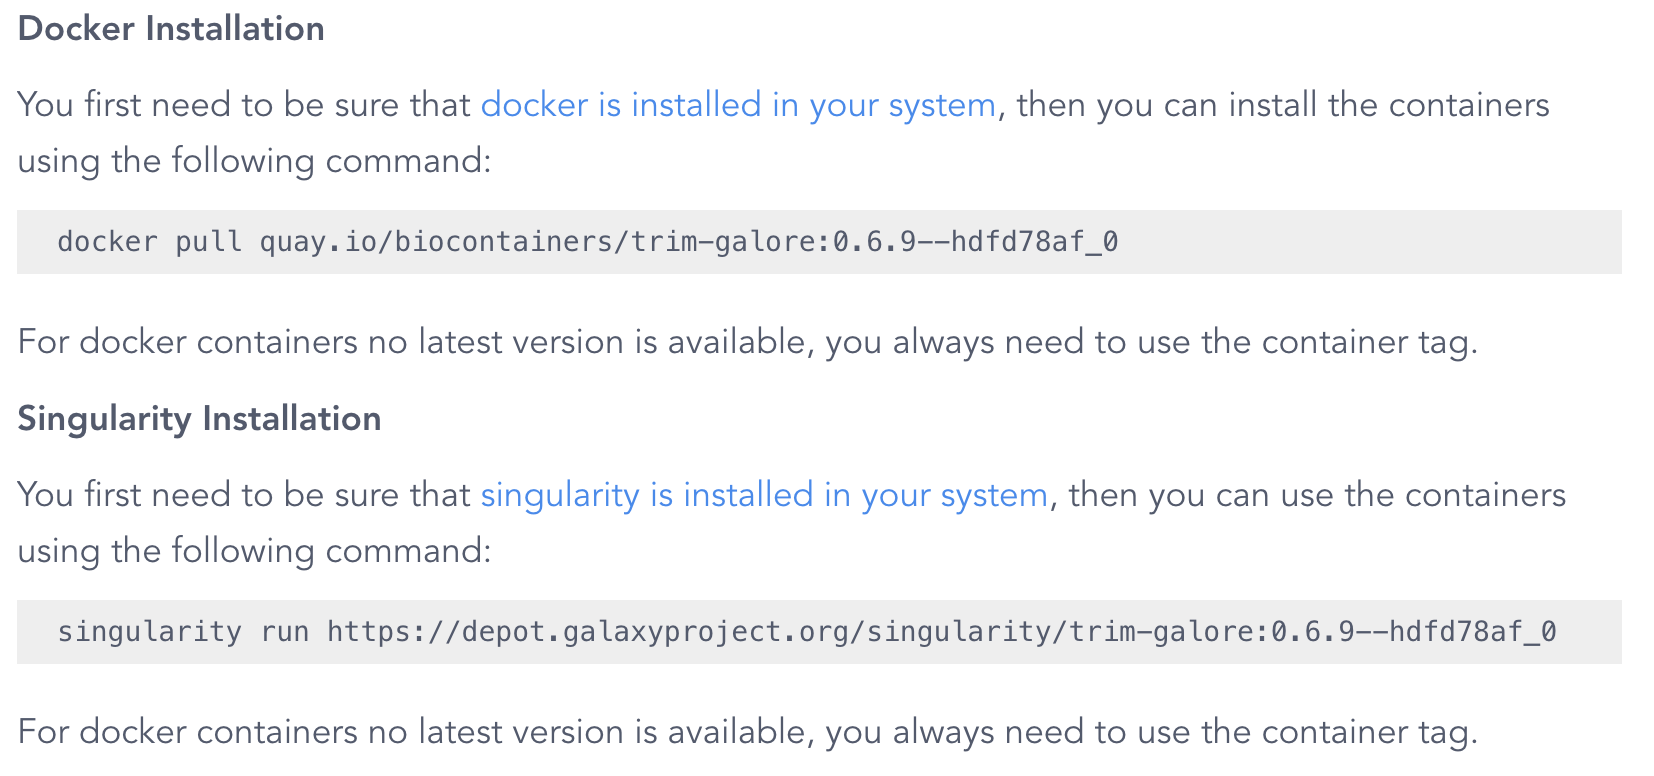
Note that the command shown is
singularity run, but we will use the more up-to-date apptainer run later.
The version tag that is shown (0.6.9--hdfd78af_0 above) pertains to the version of TrimGalore, but the result that is shown here is not will always the container image(s) with the most recent version. To see a list of all available images, click on the Packages and Containers tab towards the top, and then sort by Last Update:
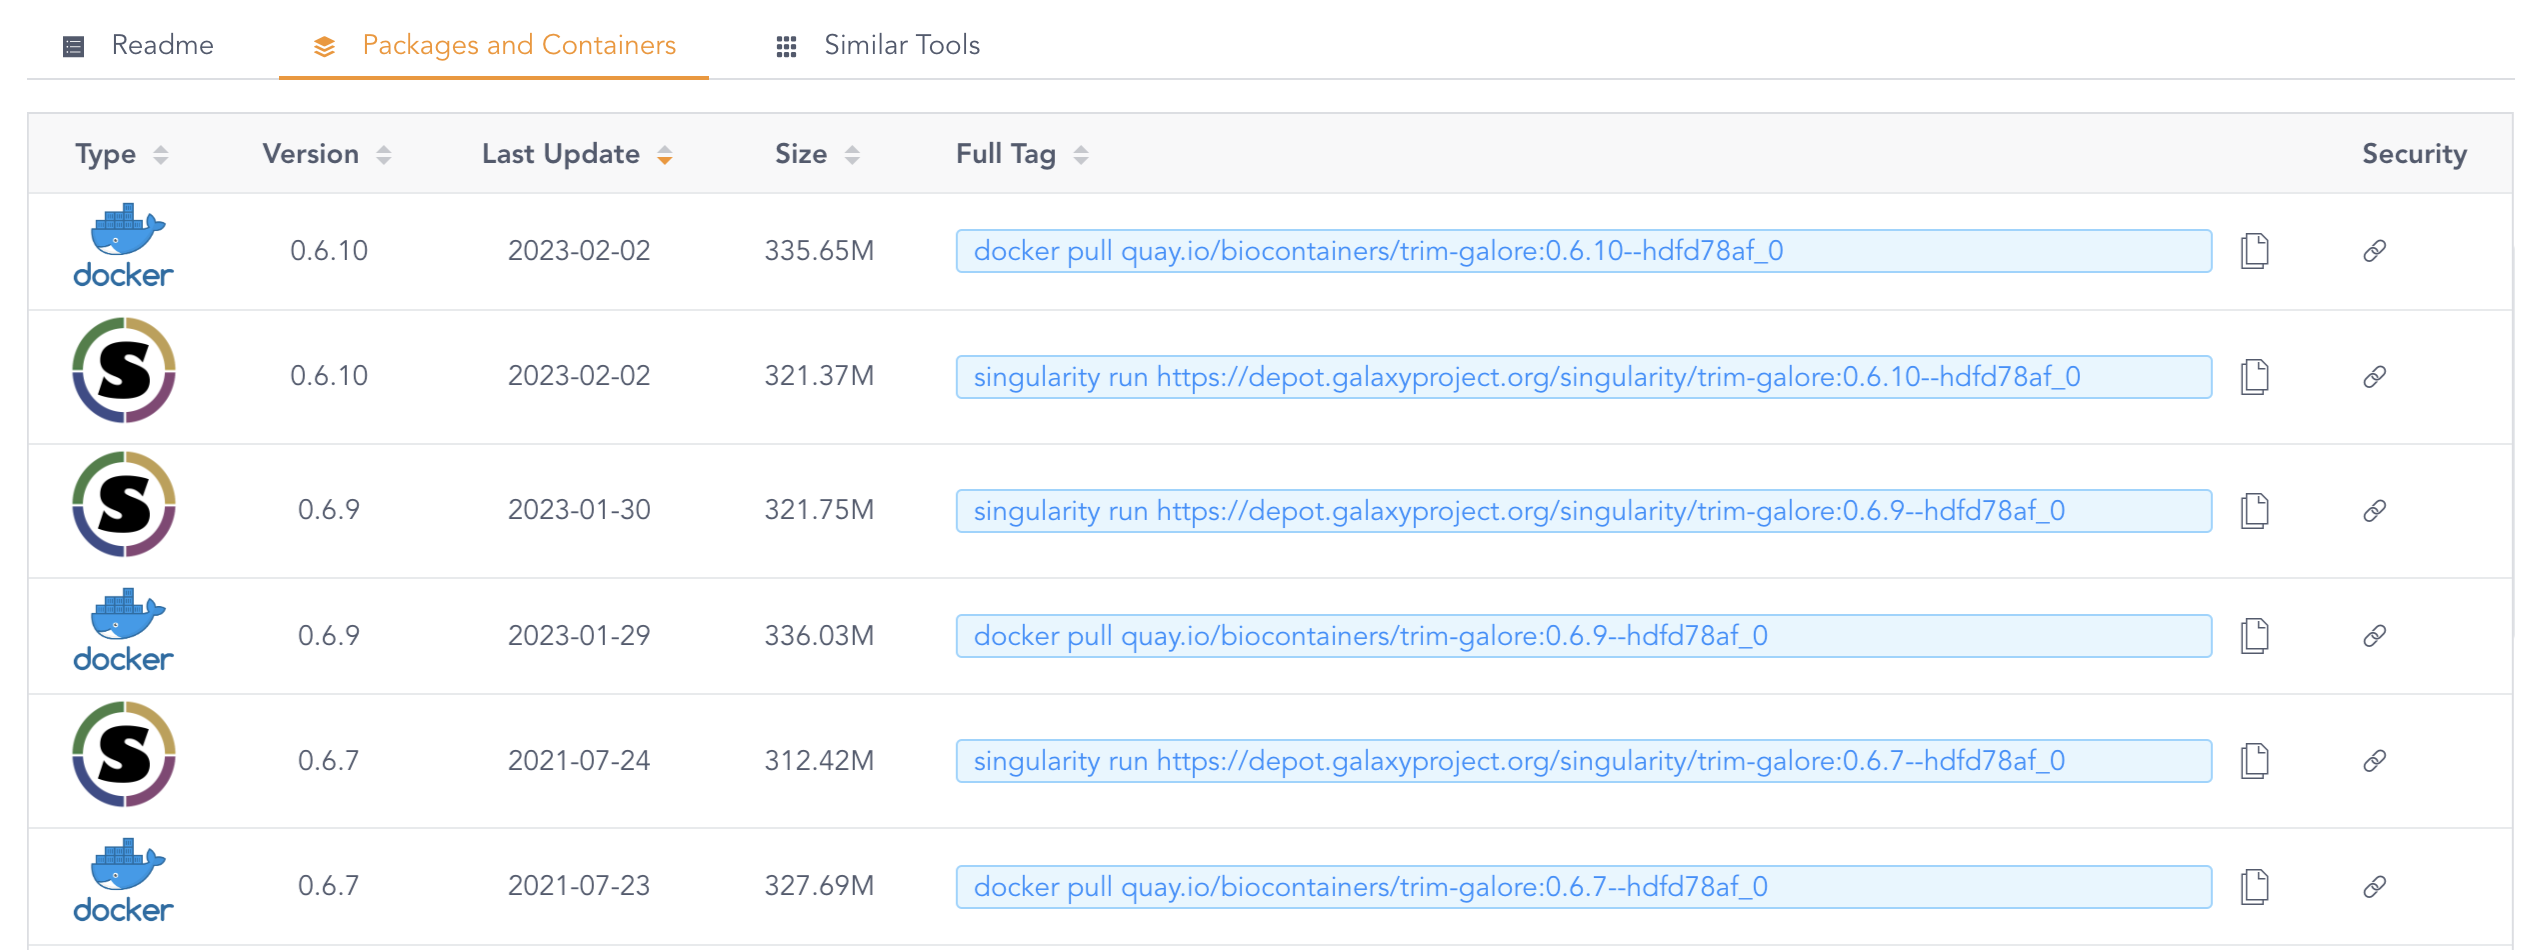
Whenever both a Singularity/Apptainer and a Docker image for the desired version of the program is available, use the Singularity/Apptainer image. This is because those don’t have to be converted, while Docker images do. But when the version you want is only available as a Docker image, that will work too: as mentioned above, it will be automatically converted to the proper format.
Running a container image
When you’ve found a container image that you want to use, copy its URL from the BioContainers website. For example, for the most recent TrimGalore version as of September 2023: https://depot.galaxyproject.org/singularity/trim-galore:0.6.10--hdfd78af_0.
You could also copy the full command — however, we will modify that in two ways:
- We will use the more up-to-date
apptainercommand7 - We’ll use the
execsubcommand instead ofrun, which allows us to enter a custom command to run in the container (therunsubcommand would only run some preset default action, which is rarely useful for our purposes).
As such, our base command to run TrimGalore in the container will be as follows:
apptainer exec https://depot.galaxyproject.org/singularity/trim-galore:0.6.10--hdfd78af_0
# (Don't run this, we'll need to add a TrimGalore command)
You can’t use the Docker URL as-is
If you want to use a Docker container, the listed quasi-URL on BioContainers will start with “quay.io”. In your apptainer exec command, you need to preface this URL with docker://. For instance:
apptainer exec docker://quay.io/biocontainers/trim-galore:0.6.10--hdfd78af_0After the code above, we would finish our command by simply entering a TrimGalore command in the exact same way as we would when running TrimGalore outside of the context of a container. For example, to just print the help info like we’ve been doing before, the TrimGalore command is:
trim_galore --helpAnd to run that inside the container, our full command will be:
apptainer exec https://depot.galaxyproject.org/singularity/trim-galore:0.6.10--hdfd78af_0 \
trim_galore --helpINFO: Downloading network image
321.4MiB / 321.4MiB [===================================================================================================================================] 100 % 3.0 MiB/s 0s
WARNING: Environment variable LD_PRELOAD already has value [], will not forward new value [/apps/xalt/xalt/lib64/libxalt_init.so] from parent process environment
 USAGE:

trim_galore [options] <filename(s)>

-h/--help               Print this help message and exits.
# [...truncated...]
Note
- The Apptainer/Singularity software does not need to be loaded at OSC, it is always automatically loaded.
- The
\in the code above allows us to continue a command on another line.
So, all that is different from running a program inside a container versus a locally installed program, is that you prefix apptainer exec <URL> when using a container.
The first time you run this command, the container will be downloaded, which can take a few minutes (by default it will be downloaded to ~/.apptainer/cache, but you can change this by setting the $APPTAINER_CACHEDIR environment variable). After that, the downloaded image will be used and the command should be executed about as instantaneously as when running TrimGalore outside of a container.
You will keep seeing the warning WARNING: Environment variable LD_PRELOAD [...] whenever you run a container, but this is nothing to worry about.
Finally, the --help option above can also simply be replaced by a host of other TrimGalore options and arguments so as to actually trim a pair of FASTQ files, i.e. with input and output files. You can just specify the paths to those files in the same way as without a container, this will work out of the box!
When to use a Container versus Conda
Currently, my default is to first try installation with Conda. But I will try a container when installing a program through Conda fails, or my Conda environment misbehaves (e.g., memory errors with dumped cores).
When you need multiple programs in quick succession or in a single command (e.g., you’re piping the output of one program into a second program), it can be more convenient to have those programs installed in a single environmnent or container. Pre-built multi-program containers are not as easy to find. And since building your own Conda environment is easier than building your own container, this is a situation where you might prefer Conda.
Footnotes
Here, we call
modulethe command and e.g.spiderthe subcommand. But sometimes the subcommands are also simply called commands.↩︎When your personal computer asks you to “authenticate” while you are installing something, you are authenticating yourself as a user with administrator privileges. At OSC, you don’t have such privileges.↩︎
Other software upon which the software that you are trying to install depends.↩︎
It isn’t feasible to keep separate environments around for many different versions of a program, mostly because Conda environments contain a very large number of files, and OSC has file number quotas. This is why I have in many cases chosen the strategy of just updating the version within the same environment.↩︎
Unless you first deactivate any active environments in your script.↩︎
That is, these settings will be saved somewhere in your OSC home directory, and you never have to set them again unless you need to make changes.↩︎
Though note that as of September 2023, the
singularitycommand does still work, and it will probably continue to work for a while.↩︎