VS Code
1 VS Code
1.1 Why VS Code?
VS Code is basically a fancy text editor. Its full name is Visual Studio Code, and it’s also called “Code Server” at OSC.
To emphasize the additional functionality relative to basic text editors like Notepad and TextEdit, editors like VS Code are also referred to as “IDEs”: Integrated Development Environments. The RStudio program is another good example of an IDE. Just like RStudio is an IDE for R, VS Code will be our IDE for shell code.
Some advantages of VS Code:
- Works with all operating systems, is free, and open source.
- Has an integrated terminal.
- Very popular nowadays – lots of development going on including by users (extensions).
- Available at OSC OnDemand (and also allows you to SSH-tunnel-in with your local installation).
1.2 Starting VS Code at OSC
Log in to OSC’s OnDemand portal at https://ondemand.osc.edu.
In the blue top bar, select
Interactive Appsand near the bottom, clickCode Server.Interactive Apps like VS Code and RStudio run on compute nodes (not login nodes). Because compute nodes always need to be “reserved”, we have to fill out a form and specify the following details:
- The OSC “Project” that we want to bill for the compute node usage:
PAS2700. - The “Number of hours” we want to make a reservation for:
2 - The “Working Directory” for the program: your personal folder in
/fs/ess/PAS2700/users(e.g./fs/ess/PAS2700/users/jelmer) - The “Codeserver Version”:
4.8(most recent)
- The OSC “Project” that we want to bill for the compute node usage:
Click
Launch.First, your job will be “Queued” — that is, waiting for the job scheduler to allocate compute node resources to it:
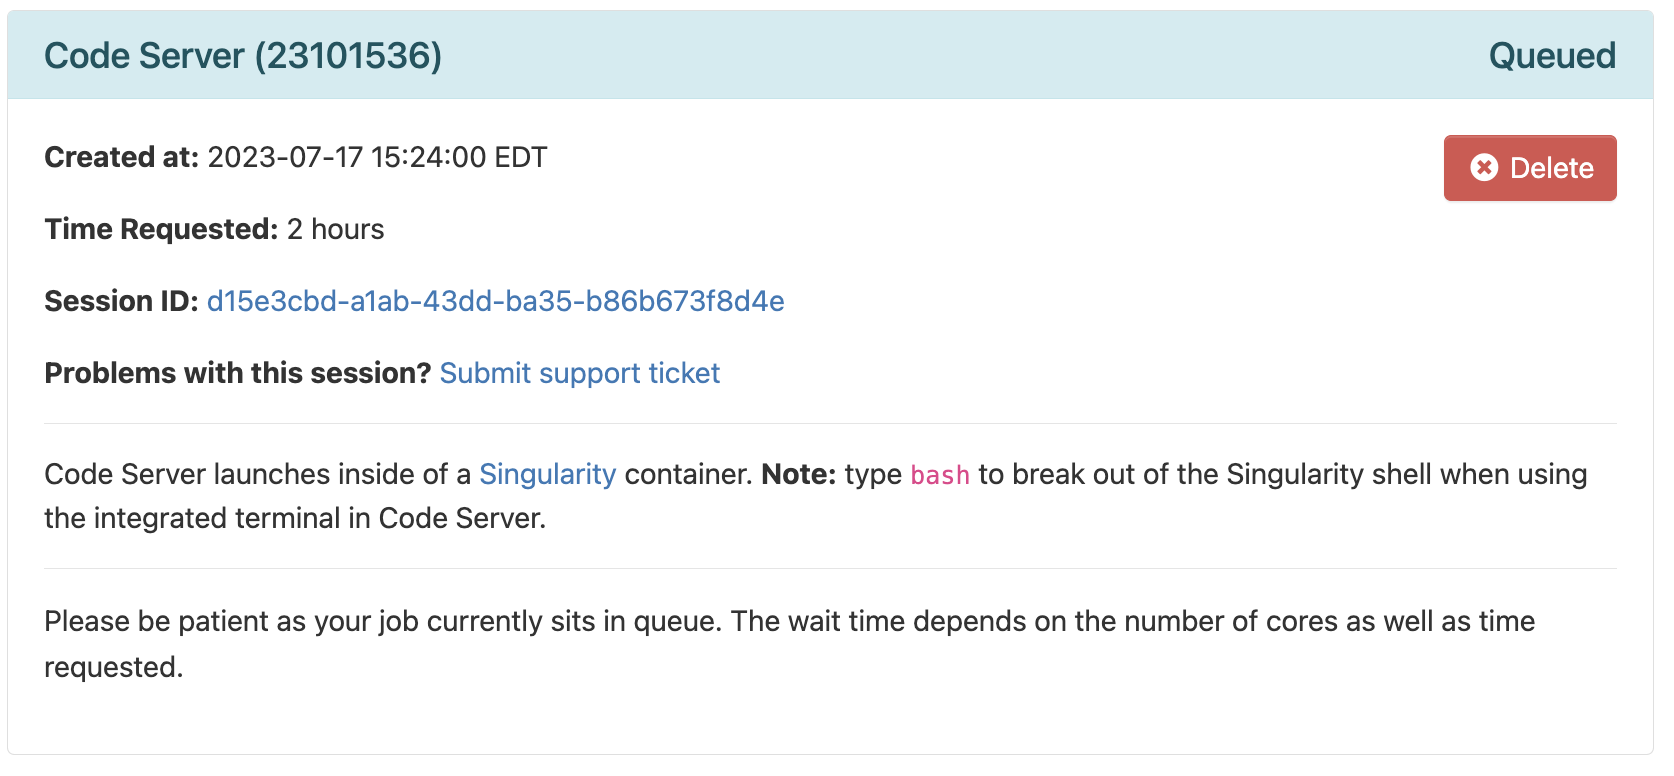
- Your job is typically granted resources within a few seconds (the card will then say “Starting”), and should be ready for usage (“Running”) in another couple of seconds:
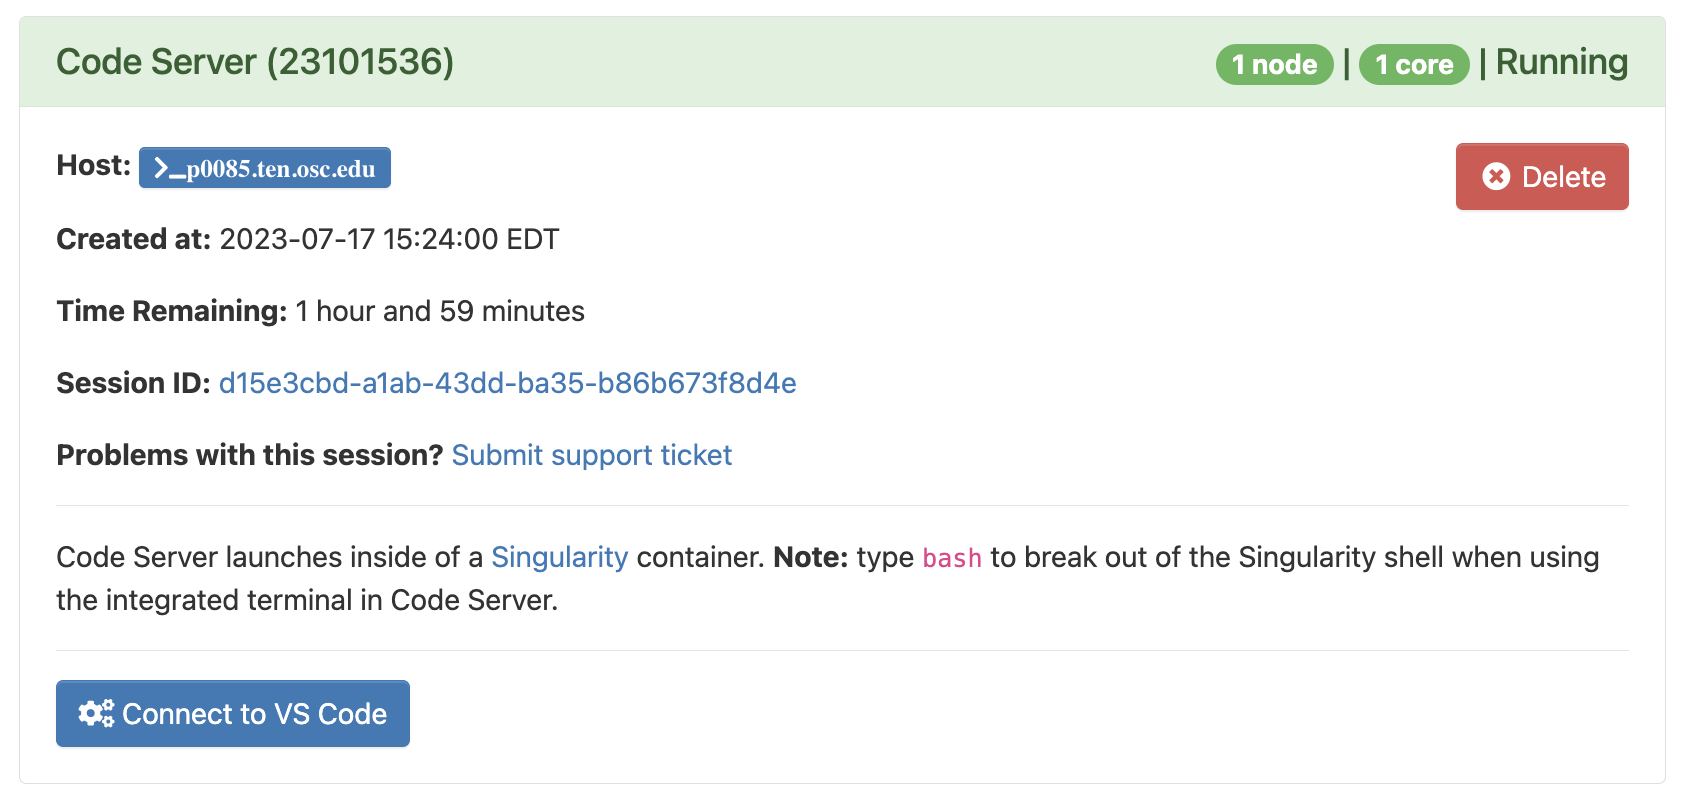
Once it appears, click on the blue Connect to VS Code button to open VS Code in a new browser tab.
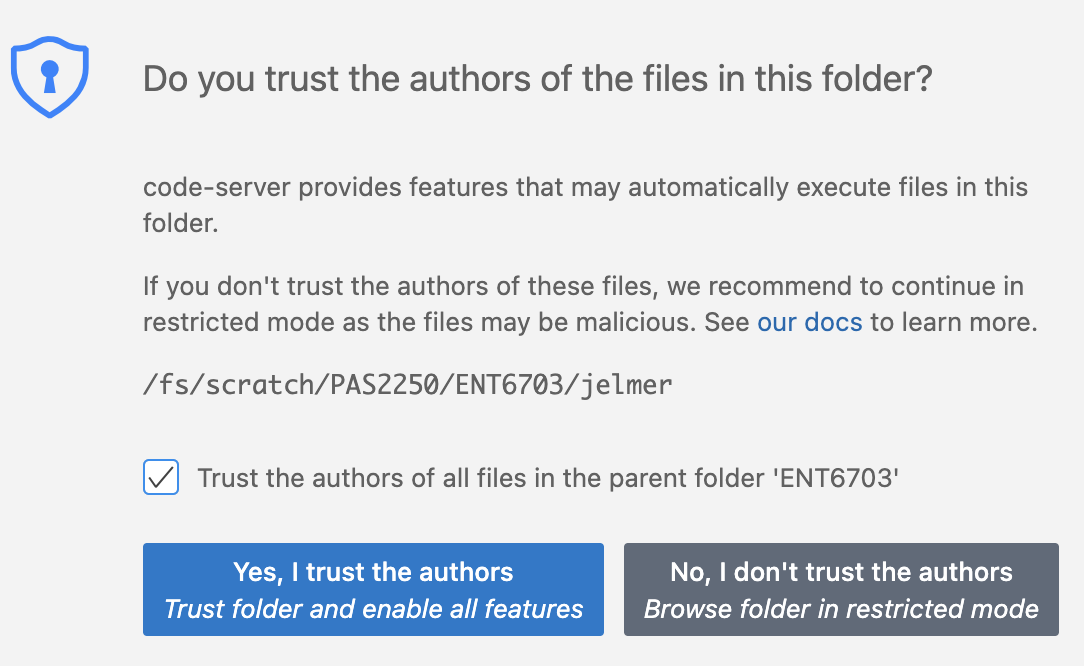
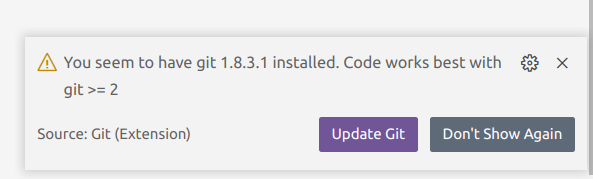
When VS Code opens, you may get these two pop-ups (and possibly some others) — click “Yes” (and check the box) and “Don’t Show Again”, respectively:
- You’ll also get a Welcome/Get Started page — you don’t have to go through steps that may be suggested there.
1.3 The VS Code User Interface
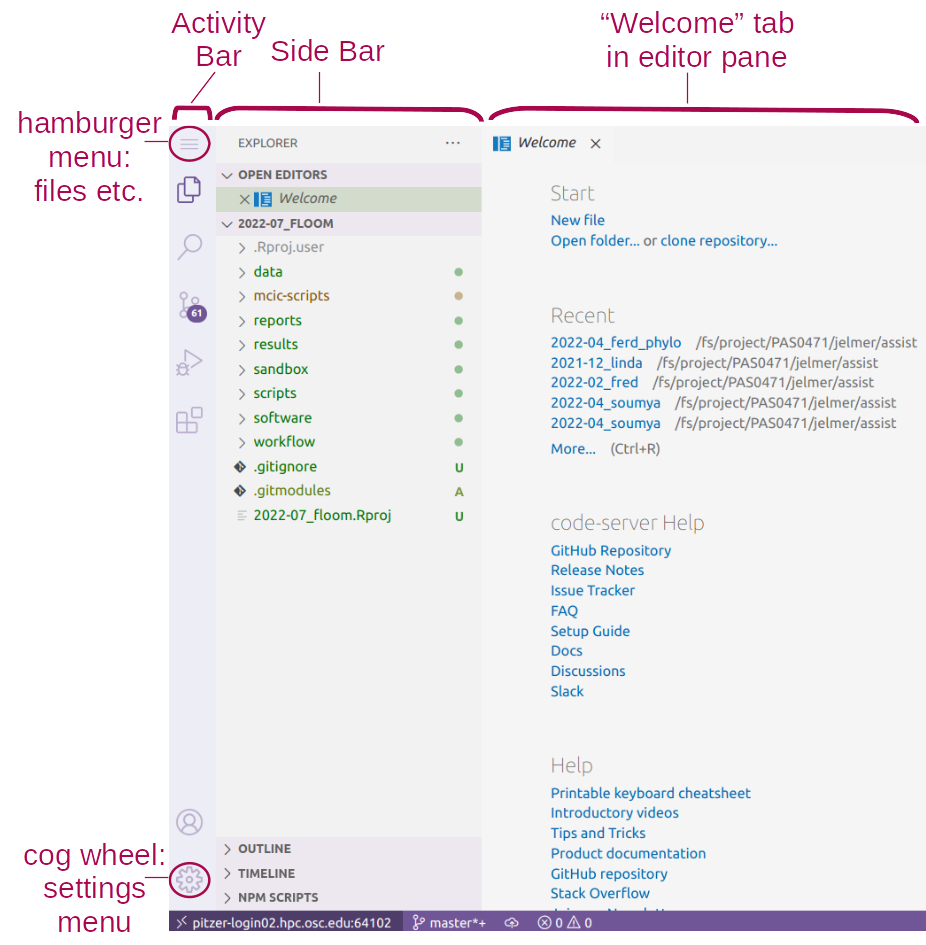
Side bars
The Activity Bar (narrow side bar) on the far left has:
A (“hamburger menu”), which has menu items like
Filethat you often find in a top bar.A (cog wheel icon) in the bottom, through which you can mainly access settings.
Icons to toggle (wide/Primary) Side Bar options:
- Explorer: File browser & outline for the active file.
- Search: To search recursively across all files in the active folder.
- Source Control: To work with Git
- Debugger
- Extensions: To install extensions
If you want to save some screen space while coding along in class, you may want to occasionally hide the side bars:
- In >
View>Appearanceyou can toggle both theActivity Barand thePrimary Side Bar. - Or use keyboard shortcuts:
- Ctrl/⌘+B for the primary/wide side bar
- Ctrl+Shift+B for the activity/narrow side bar
Exercise: Try a few color themes
- Access the “Color Themes” option by clicking =>
Color Theme. - Try out a few themes and see pick one you like!
Terminal (with a Unix shell)
Open a terminal by clicking => Terminal => New Terminal.
Create a directory for this tutorial, e.g.:
# You should be in your personal dir in /fs/ess/PAS2700
pwd/fs/ess/PAS2700/users/jelmermkdir week02Editor pane and Welcome document
The main part of the VS Code is the editor pane. Here, we can open files like scripts and other types of text files, and images. (Whenever you open VS Code, an editor tab with a Welcome document is automatically opened. This provides some help and some shortcuts like to recently opened files and folders.)
Let’s create and save a new file:
- Open a new file: Click the hamburger menu , then
File>New File. - Save the file (Ctrl/⌘+S), inside the dir you just created, as a Markdown file, e.g.
markdown-intro.md. (Markdown files have the extension.md.)
1.4 A folder as a starting point
Conveniently, VS Code takes a specific directory as a starting point in all parts of the program:
- In the file explorer in the side bar
- In the terminal
- When saving files in the editor pane.
This is why your terminal was “already” located in /fs/ess/PAS2700/users/$USER.
File > Open Folder.
When you reopen a folder you’ve had open before, VS Code will resume where you were before in that it will:
- Re-open any files you had open in the editor pane
- Re-open a terminal if you had one active
This is quite convenient, especially when you start working on multiple projects and frequently switch between those.
Some tips and tricks
Resizing panes
You can resize panes (terminal, editor, side bar) by hovering your cursor over the borders and then dragging.The Command Palette
To access all the menu options that are available in VS Code, the so-called “Command Palette” can be handy, especially if you know what you are looking for. To access the Command Palette, click and thenCommand Palette(or press F1 or Ctrl/⌘+Shift+P). To use it, start typing something to look for an option.Keyboard shortcuts
For a single-page PDF overview of keyboard shortcuts for your operating system: =>Help=>Keyboard Shortcut Reference. (Or for direct links to these PDFs: Windows / Mac / Linux.) A couple of useful keyboard shortcuts are highlighted below.
Working with keyboard shortcuts for common operations can be a lot faster than using your mouse. Below are some useful ones for VS Code (for Mac, in some case, you’ll have to replace Ctrl with ⌘):
- Open a terminal: Ctrl+` (backtick) or Ctrl+Shift+C.
- Toggle between the terminal and the editor pane: Ctrl+` and Ctrl+1.
- Line actions:
- Ctrl/⌘+X / C will cut/copy the entire line where the cursor is, when nothing is selected (!)
- Ctrl/⌘+Shift+K will delete a line
- Alt/Option+⬆/⬇ will move lines up or down.
Exercise: Install two extensions
Click the gear icon and then Extensions, and search for and then install:
- shellcheck (by simonwong) — this will check our shell scripts later on!
- Rainbow CSV (by mechatroner) — make CSV/TSV files easier to view with column-based colors